Measure the straight panel under pressure
A lightweight PET bottle is designed to use less material, not to serve as a rigid label test cylinder. Its shoulder ribs, middle wall and base move differently. Before approving a wrap, I would measure the straight label panel on a filled bottle at the intended internal pressure and choose a die line with enough clearance from the ribbed zones.
A composite sparkling-water launch has two bottle suppliers for the same 500 mL fill. One has a softer grip zone. The team wants a common label to avoid another stock keeping unit. I would test one common width on both bottles, but I would not promise that the softer wall will look equally smooth after squeezing. A narrower label or more conformable face may be worth the second die line.
Dry application is different from wet service
Bottles often meet condensation after chilling. That does not mean they should be dripping at label application. Avery Dennison's PET-container technical guide discusses removing spill and condensation close to the applicator and warns that trapped water can cloud clear adhesive. The note addresses a specific construction, not every possible label, but its process lesson is valuable.
I would record whether labels are applied before cooling, after cooling, or immediately after a wet filling step. A film that resists refrigerator moisture may still show silvering or milky spots if applied over water droplets. Solve the sequence first, then select material.
Test the edge after a real squeeze
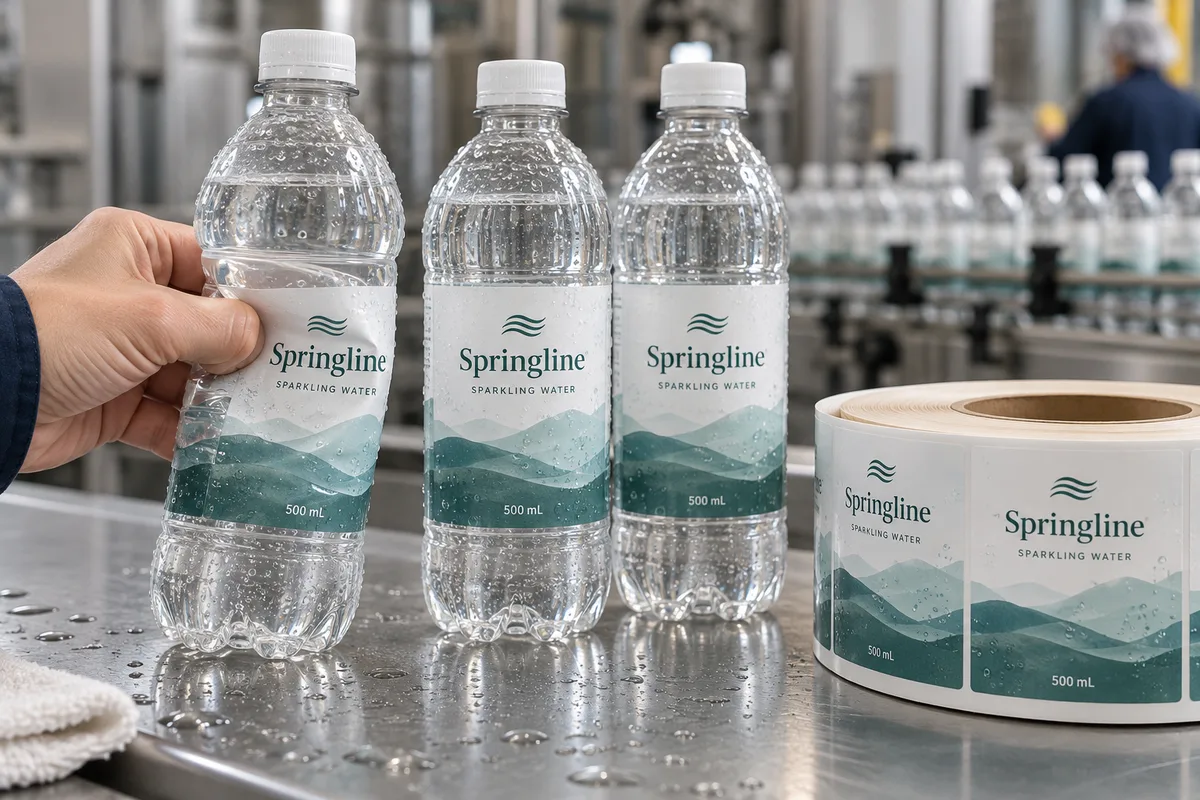
On the fictional Springline bottle pictured here, the front label is deliberately placed on the straight section. The hand squeeze is a reminder to inspect both label ends and the area of maximum flex. It is an AI-generated placement illustration, not a measured durability result.
For a production proof, apply the final roll at line speed, then chill, dry, squeeze and rub bottles as a customer might. Note whether a failure starts at the leading edge, trailing edge or a rib. Those observations can distinguish label stiffness, wipe-down pressure and surface moisture. If the whole panel moves dramatically, a printed sleeve or a shorter label deserves comparison.
The quote brief
Send filled bottles from each supplier, panel height and circumference, planned seam gap, application temperature, chilling sequence, line speed, roll direction and artwork. State whether the bottle will be recycled in a market with specific label-design guidance; adhesive choices for recovery are not the same as adhesion alone.
I would ask for a short physical run before bulk print. A pretty render cannot show the edge after the first customer's grip.
Our buying view
What we would decide first
Use the actual lightweight filled PET bottle to judge edge behavior after a squeeze. A short trial on the actual pack can settle that question before a full printed roll is ordered.
Related buyer guides
Frequently asked questions
Why do labels flag on lightweight PET bottles?
Bottle flex, stiff face stock, panel geometry or application pressure can all contribute. Test the filled bottle after squeezing.
Does a waterproof label work on wet PET?
Not automatically. Keep the application surface as dry as the selected construction requires, then test wet service separately.
Review your label specification
Send the real package, dimensions, order quantity, labeling stage, storage conditions and artwork. We can discuss a practical material and proof route.